Using Azure Active Directory as Identity Provider
Configuring Azure Active Directory
Hint - example configuration
The following configuration is an example of SealCC and DPF Tracker.
-
Log on to the Azure portal and open
Azure Active Directory. -
In
App registrations, selectNew registrationto create a new app.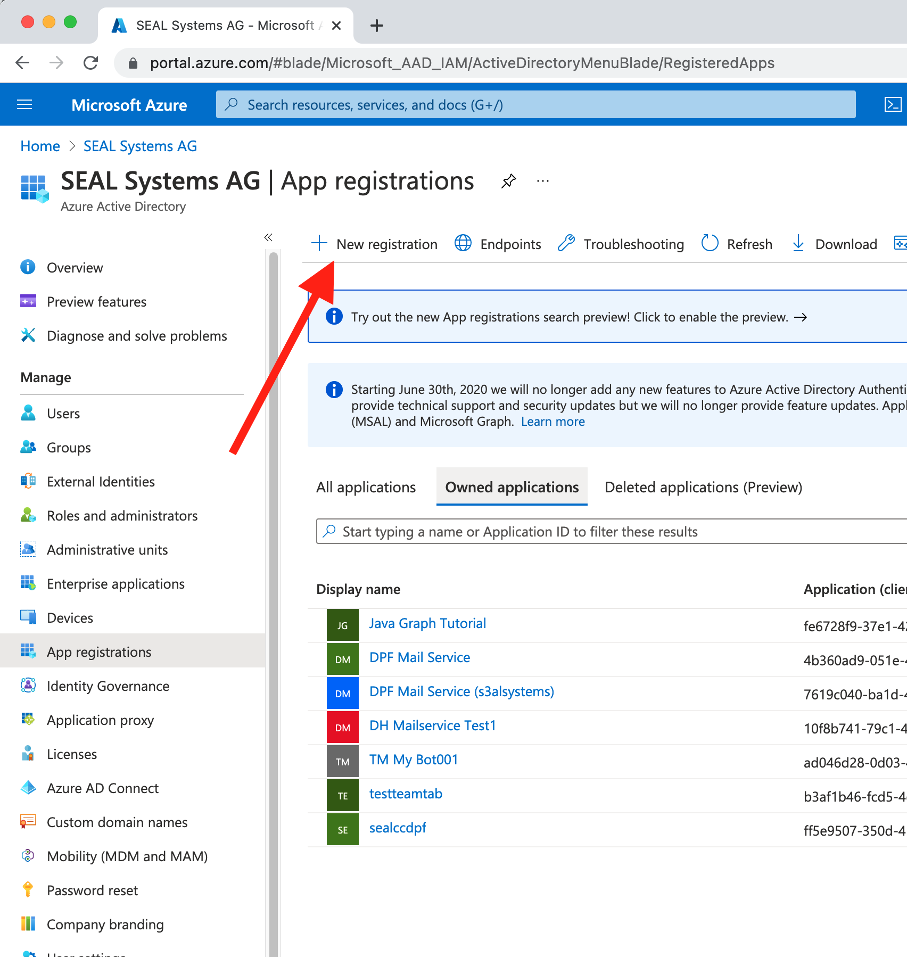
-
Select a display name for the app and register it.
-
In
Authentication, selectAdd a platformand add aWebplatform.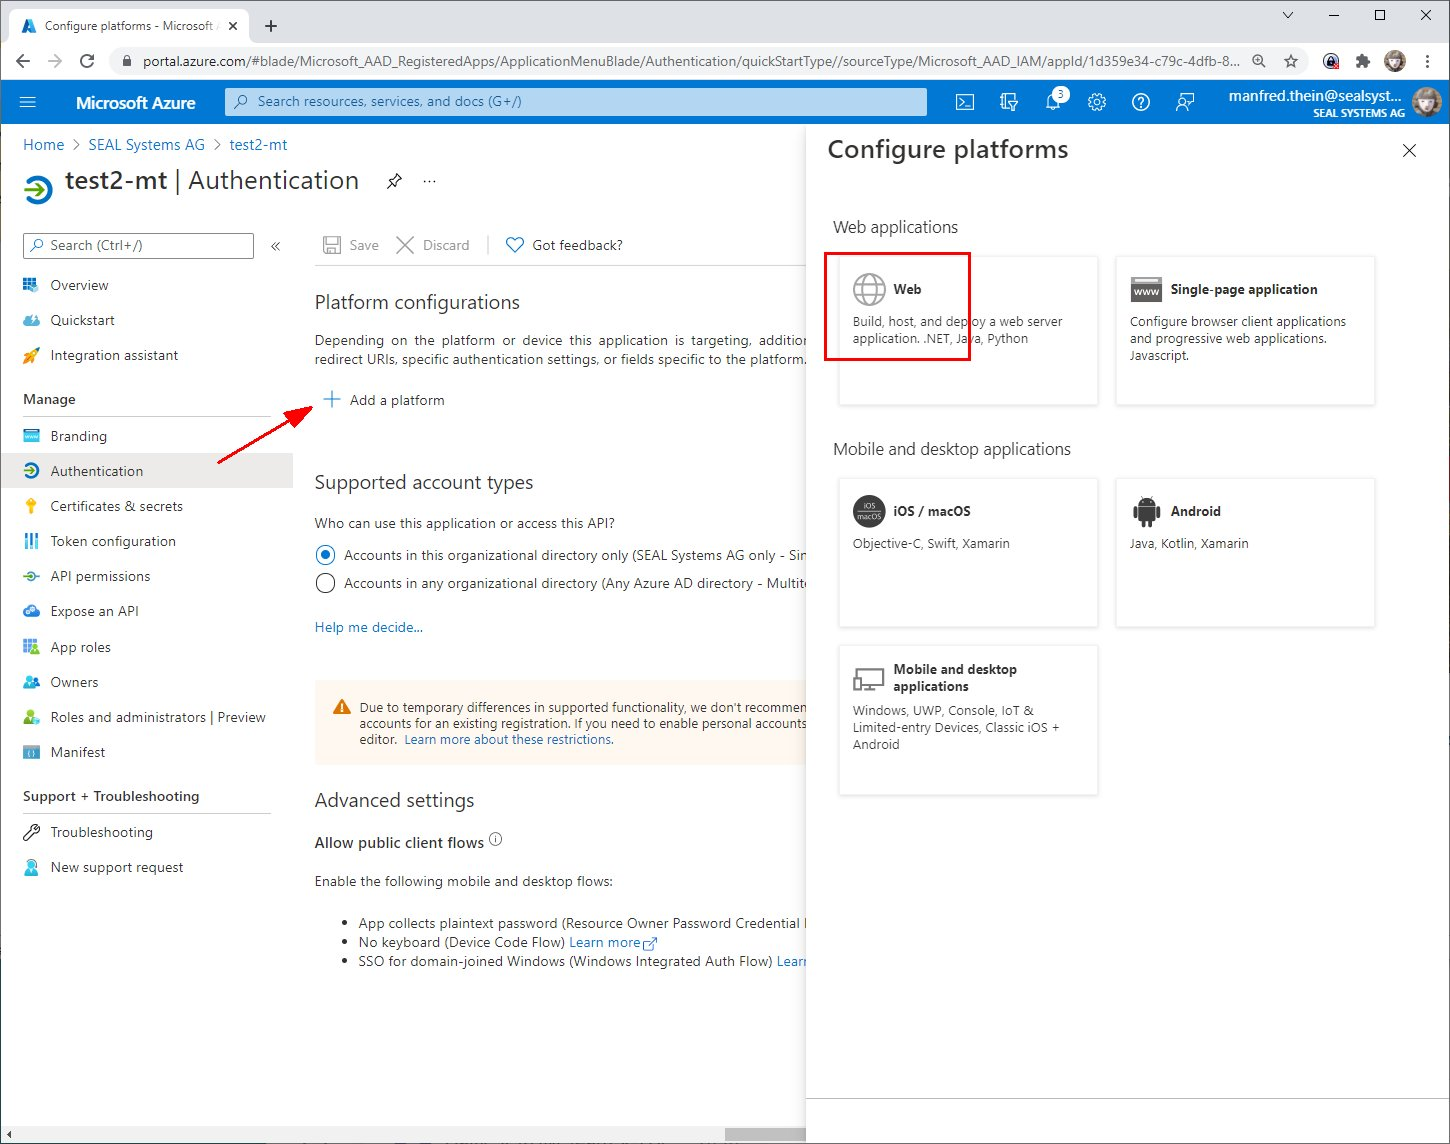
-
Add the redirect URIs with complete path and query parameters, e. g.
-
for SEALCC:
https://127.0.0.1:9126/cgi-bin/sealcc/sealcc?function=oauthLogin&package=sealcc%3A%3Aplugins%3A%3Alogin&lastfunction=oauthlogin -
for DPF Tracker:
https://127.0.0.1:9126/cgi-bin/dpftracker?login=1
-
-
In
Certificates & secrets, create a new client secret.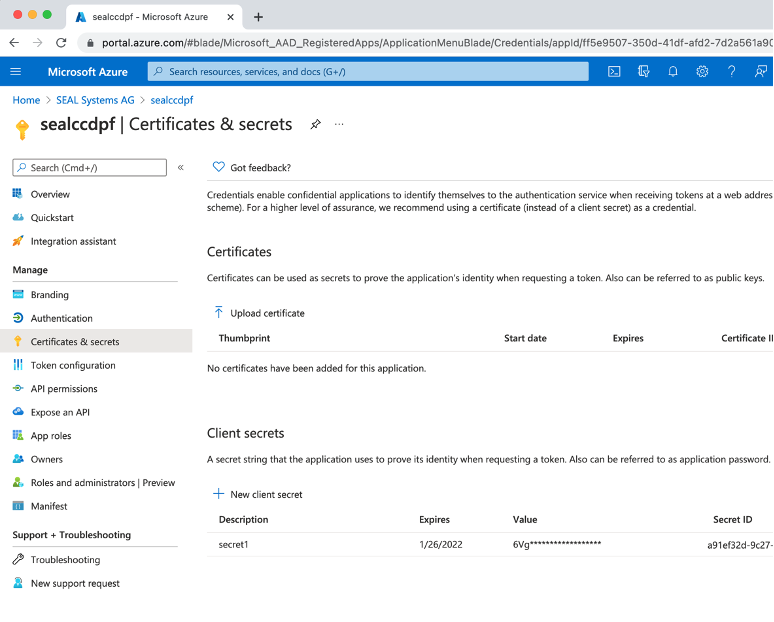
-
In
Token configuration, add thegroups claimto the ID token.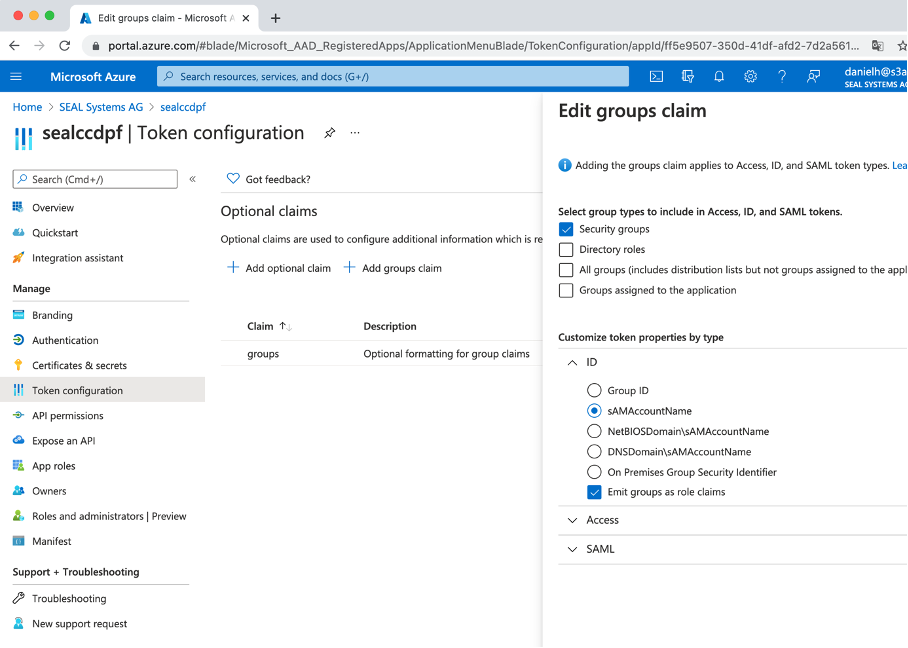
-
In
API Permission, add theopenidpermission.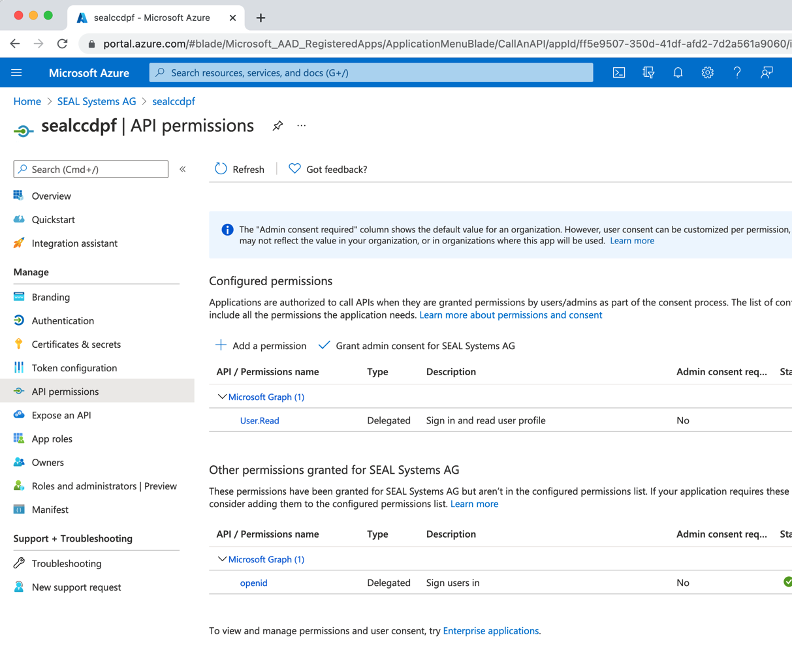
-
In
expose an API, add a scope.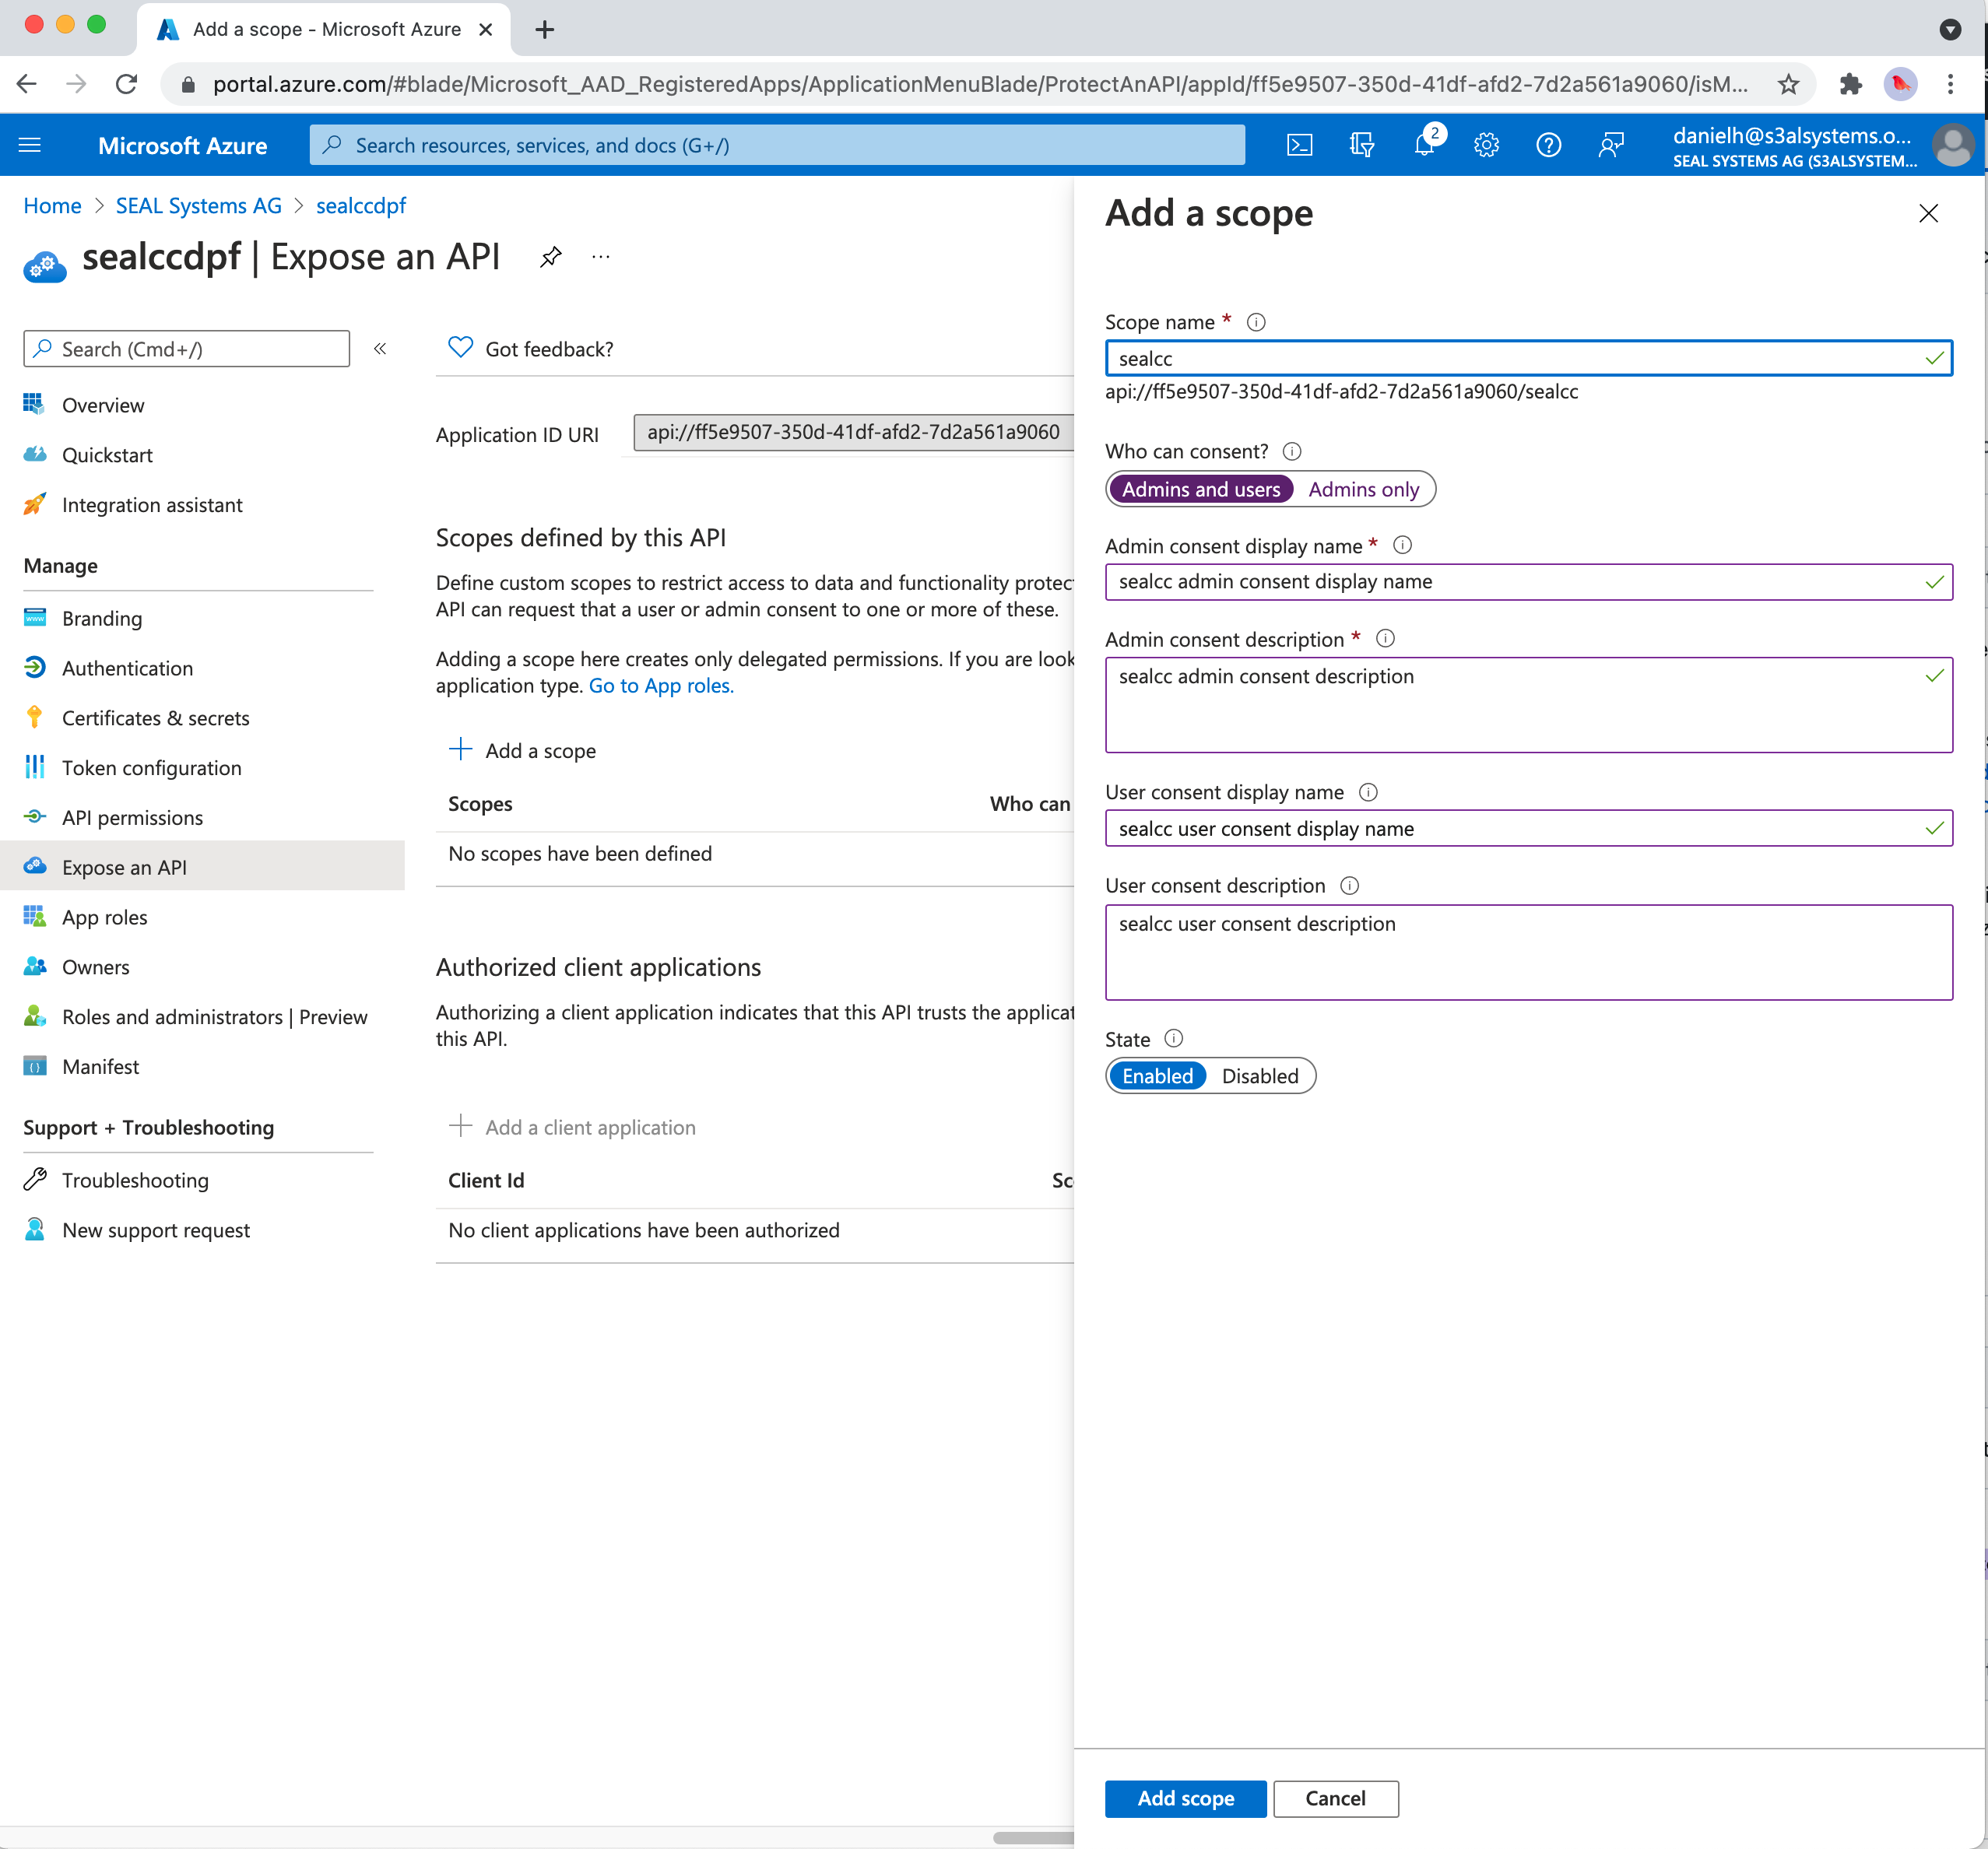
-
In
Manifest, check the value ofaccessTokenAcceptedVersion. It has to be2.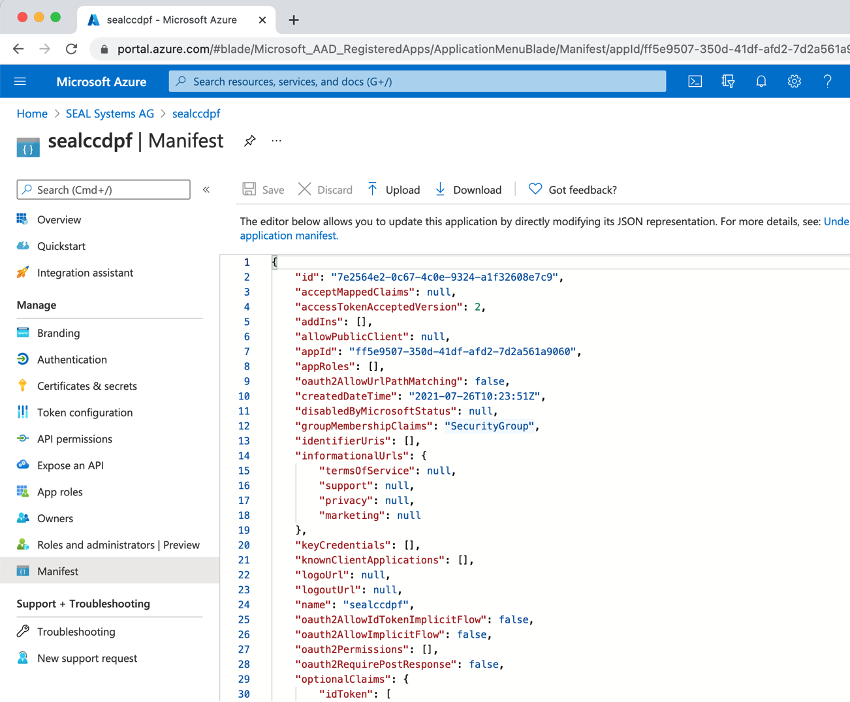
-
In
Overview, find a list of all necessary endpoint URIs.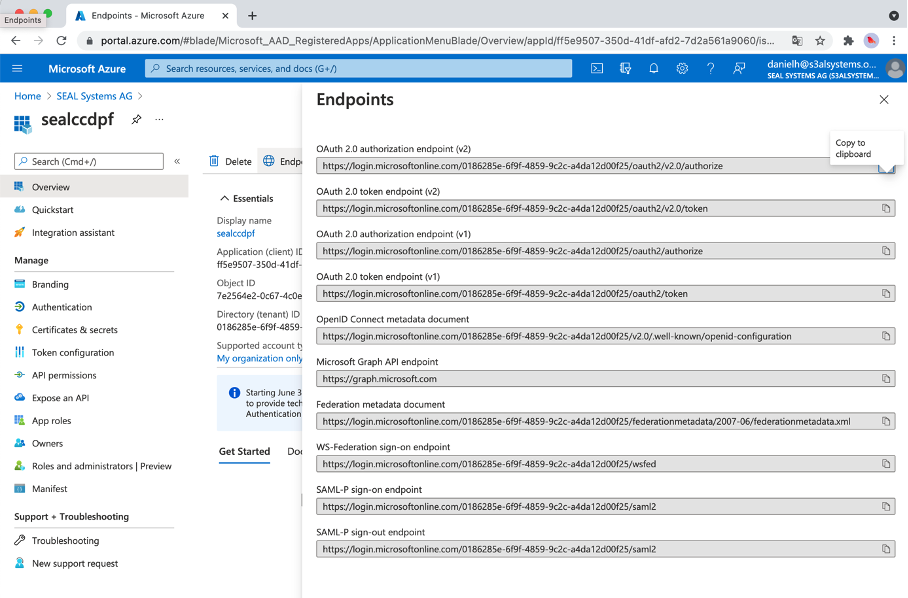
-
Configure your SEAL Systems applications with the corresponding end points and the created scope.
-
in the given example:
api://ff5e9507-350d-41df-afd2-7d2a561a9060/sealcc
-
-
Repeat the steps for any other client you whish to configure.
For a list of currently available clients, see SEAL Clients.