Roles and Privileges
After you have installed the SEAL-specific Keycloak and PLOSSYS Output Engine, the SEAL-specific Keycloak offers predefined realm roles and matching predefined users.
The granted privileges of the roles depend on the SEAL clients that use these roles.
Predefined Roles
The SEAL-specific Keycloak offers the following predefined realm roles:
-
admin -
custom -
readonly
Literature
For details on adding customer-specific realm roles, see Keycloak.
Predefined Test Users
For each of the roles listed above you will find a predefined user for testing purposes:
-
seal-admin -
seal-custom -
seal-readonly
The test users are inactive by default. Activate the users, if you whish to use them. The password for the test users is test and is identical for all three test users.
Literature
For details on adding customer-specific users, see Keycloak.
Activating Users
-
In your Web browser, open the Keycloak
Administration Console: https://localhost:32769 -
Log on with your user name and password.
If you have not yet changed the default password, see Changing the
adminPassword. -
Open the
Manage realmsmenu on the left.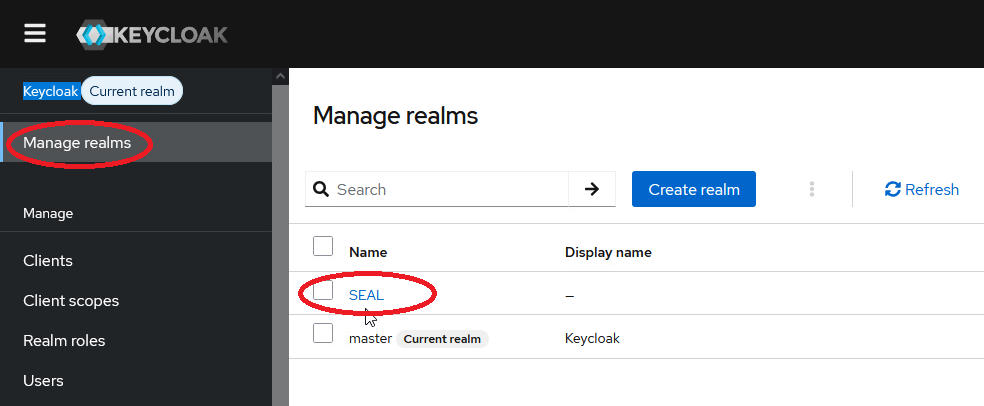
-
In the list, select the
SEALrealm. -
In the
Managemenu on the left, selectUsersto open the users list.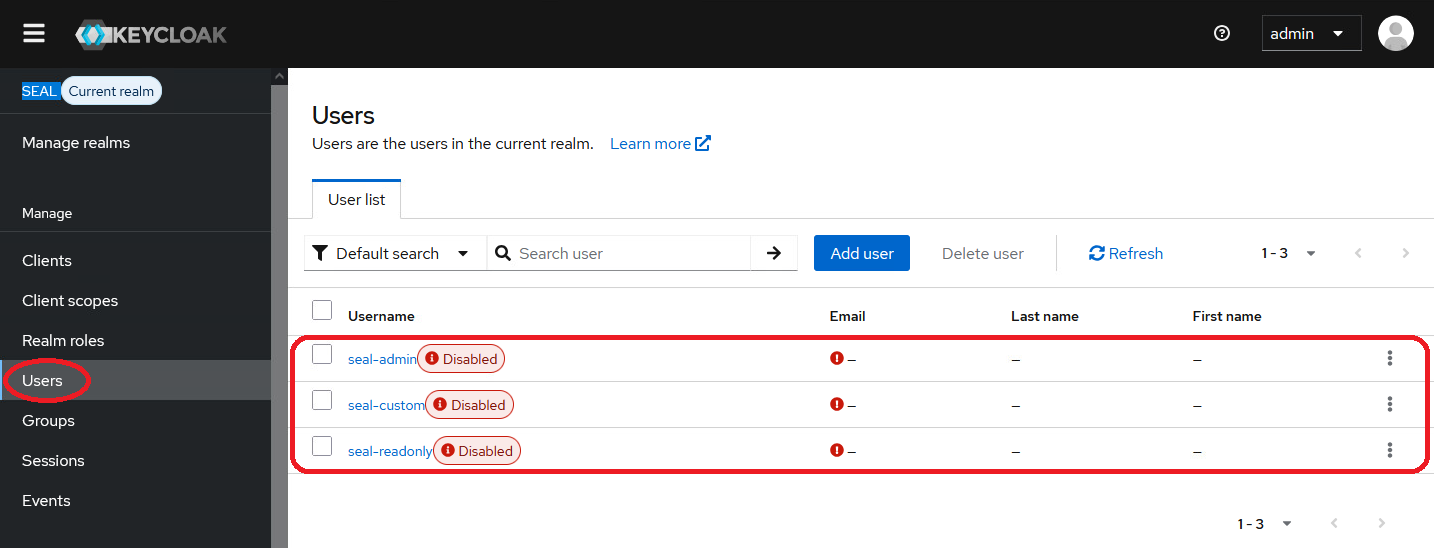
-
In the
Usernamecolumn, select the desired user. -
In the right upper corner, switch the button from
DisabledtoEnabled.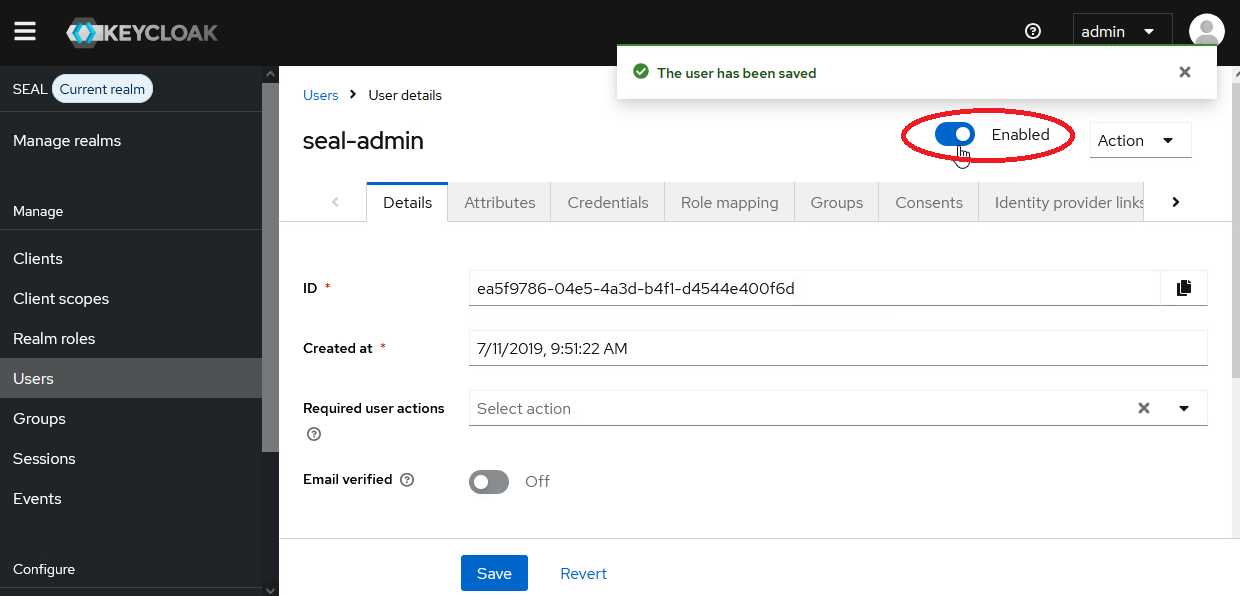
The change is saved automatically.
Preconfigured Privileges for SEAL Clients
In the PLOSSYS REST-API, you will find preconfigured privileges for several SEAL clients and roles:
| SEAL Client | Roles |
|---|---|
seal-easyprima |
admin |
seal-mobile-print |
custom |
seal-plossysadmin |
admin, custom, readonly |
seal-plossyscli |
admin, custom, readonly |
Literature
For details on changing the privileges of the roles, see PLOSSYS Output Engine.