Using AD FS as Identity Provider
Requirements
You have to meet the following requirements to use AD FS (Microsoft Active Directory Federation Services) as identity provider:
-
Windows Server 2016 or 2019
-
AD FS version Windows Server 2016 or later
-
AD FS is activated
Configuring AD FS
Creating the Server Application Role
The following instructions show the steps using the example of SEAL Operator. They are identical for other clients.
-
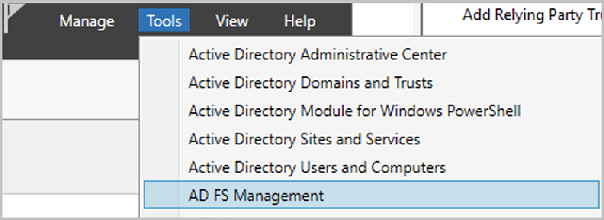
Open the AD FS Management Console.
-
Open
Application Groups.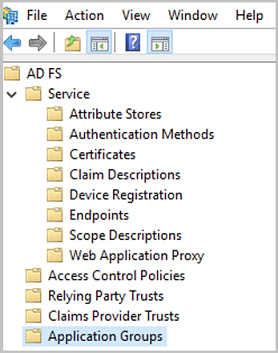
-
Select
Add Application Group.... -
In the
Add Application Group...dialog specify the client name:Here
SEAL Operator. -
In the
Templatesection, select theServer applicationtemplate.Proceed with
Next.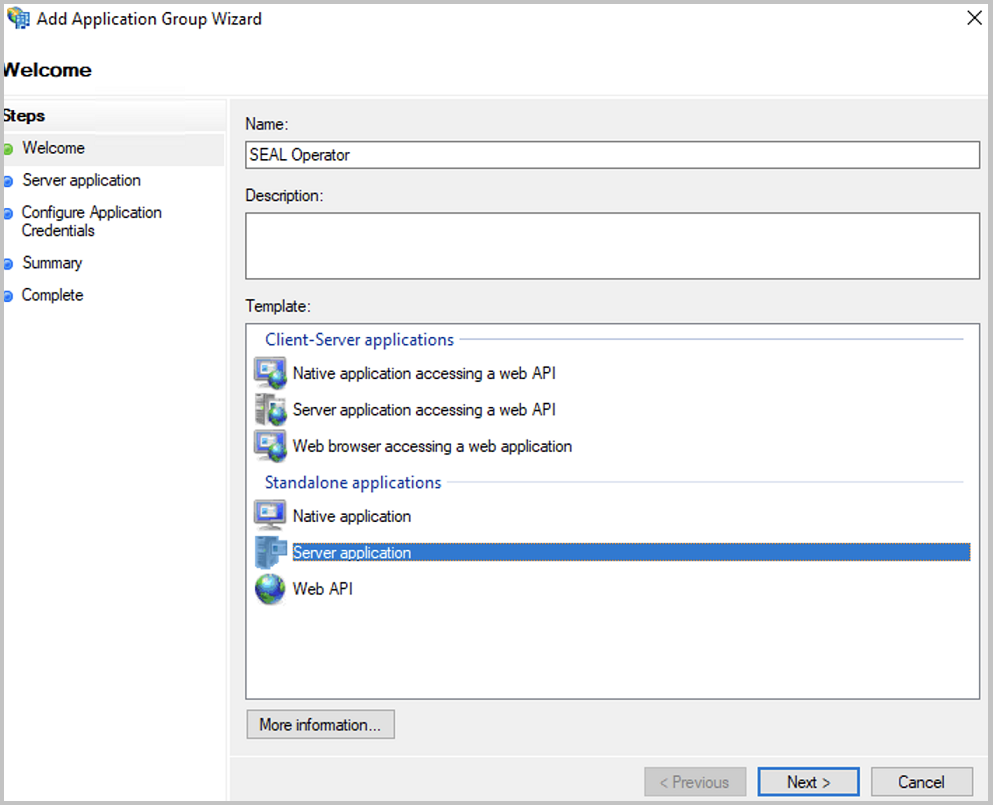
-
In the server application dialog, specify the
Redirect URI:Here
https://localhost:3000andhttps://<operator_server_name>:3000with
<operator_server_name>: server on which SEAL Operator is installed. The server has to be reacheable by both, users and AD FS server.Hint - memorize the ID
Memorize the ID displayed in
Client Identifier. You will need it later to configure SEAL Operator (AUTH_CLIENT_ID).Add a description, if required and proceed with
Next.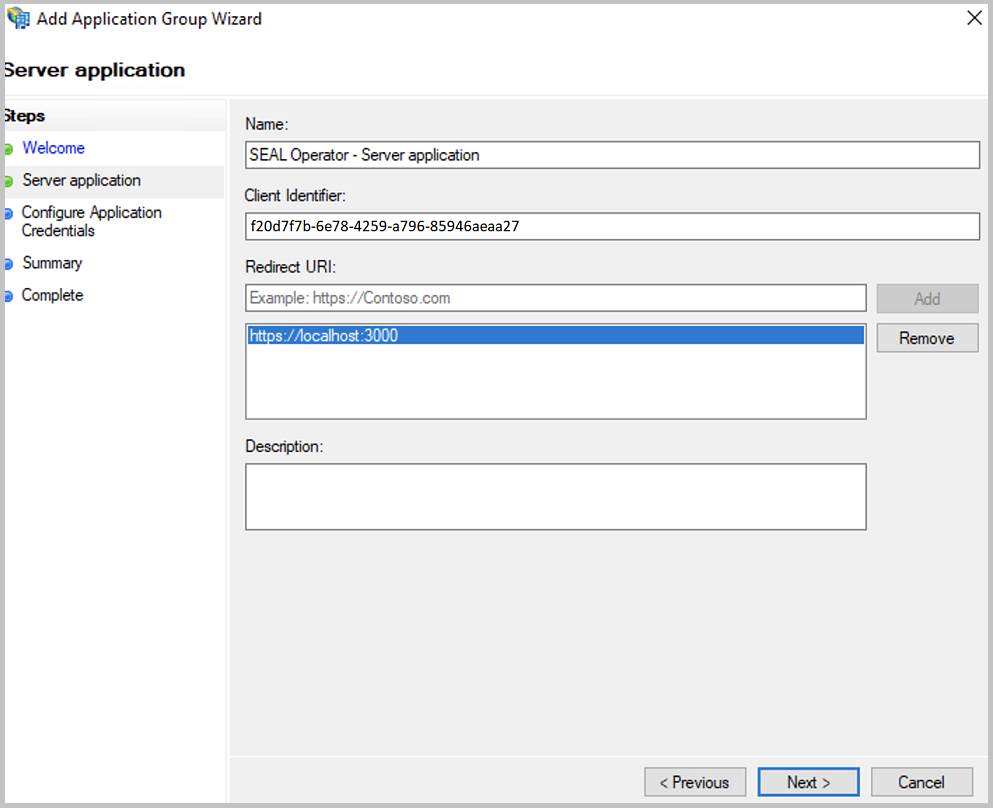
-
In the
Configure Application credentialsdialog, tickGenerate a shared secret.Hint - memorize the secret
Save the generated secret by copying. You will need it later to configure SEAL Operator (
AUTH_CLIENT_SECRET).Proceed with
Next.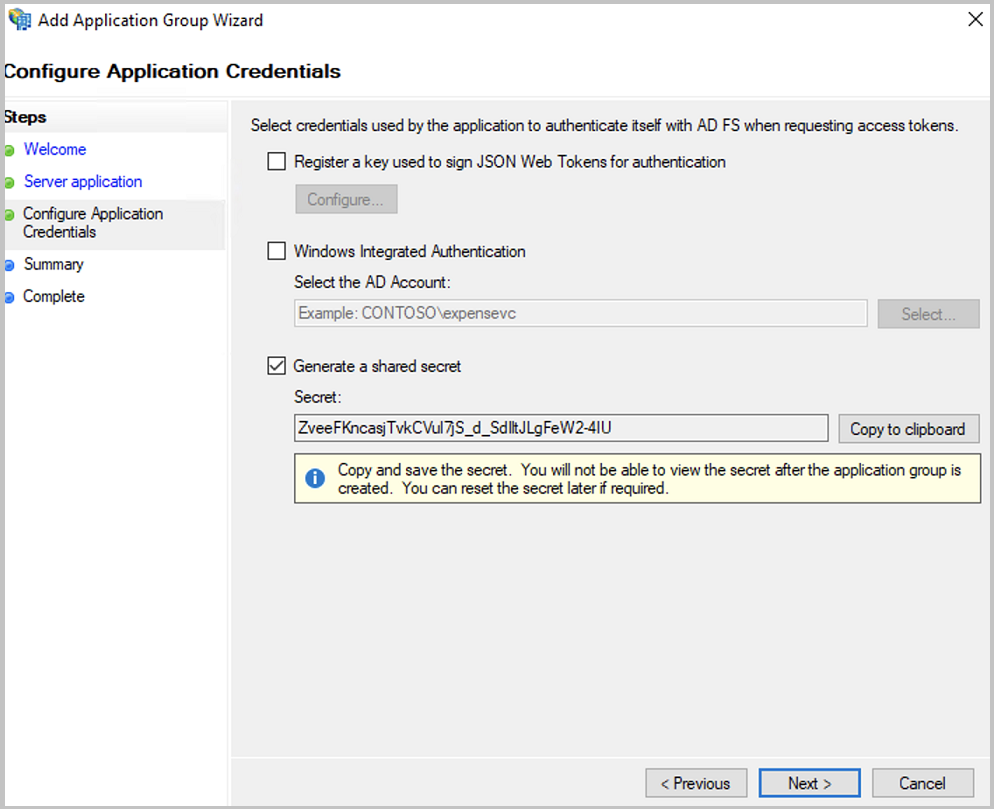
-
Finish the configuraton with
Close. -
Repeat the steps for any other client you whish to configure.
For a list of currently available clients, see SEAL Clients.
Adding a Web API to the Application
The application requires a Web API, in which permissions can be specified for the clients.
The following instructions show the steps using the example of SEAL Operator. They are identical for other clients.
-
In the
Propertiesdialog of the application group, clickAdd application...to start the wizard.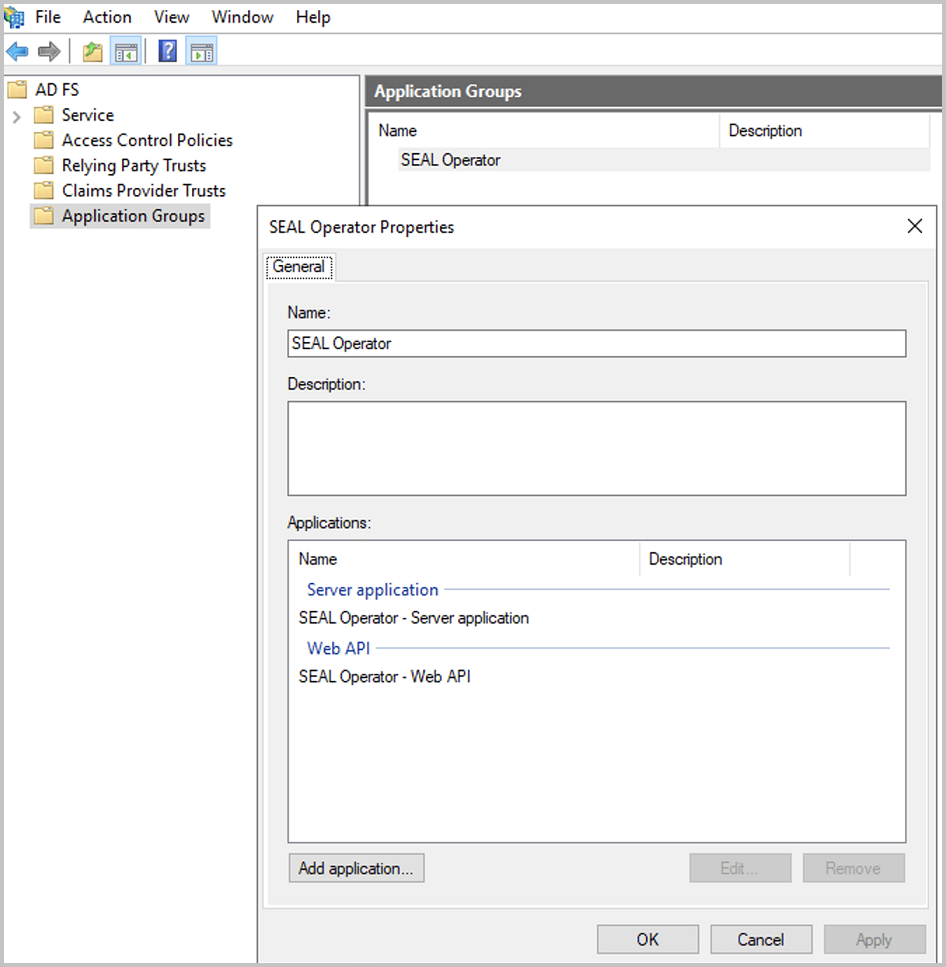
-
Select
Web APIand proceed withNext. -
In the
Configure Web APIdialog, specify the name.In
Identifier, specify the same identifier as inClient Identifierin theServer applicationdialog above:Here
f20d7f7b-6e78-4259-a796-85946aeaaa27Addthe identifier to theIdentifierlist and proceed withNext.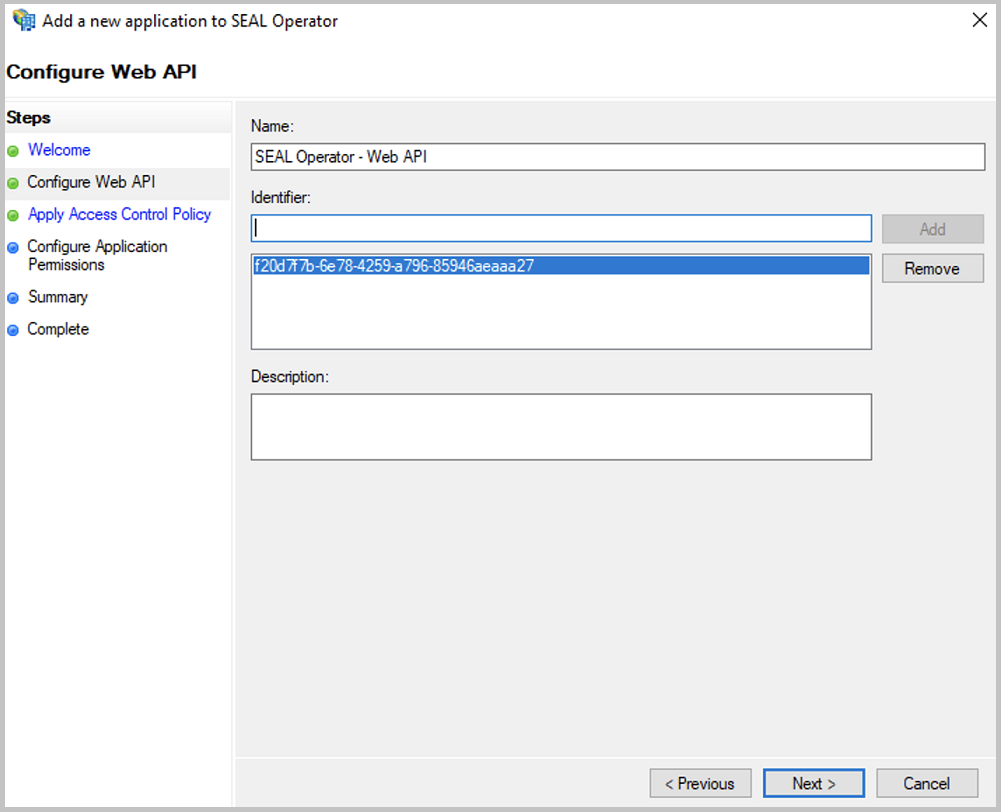
-
In the
Apply Access Control Policydialog, selectPermit everyone, since the SEAL Operator services have to authenticate themselves.Proceed with
Next.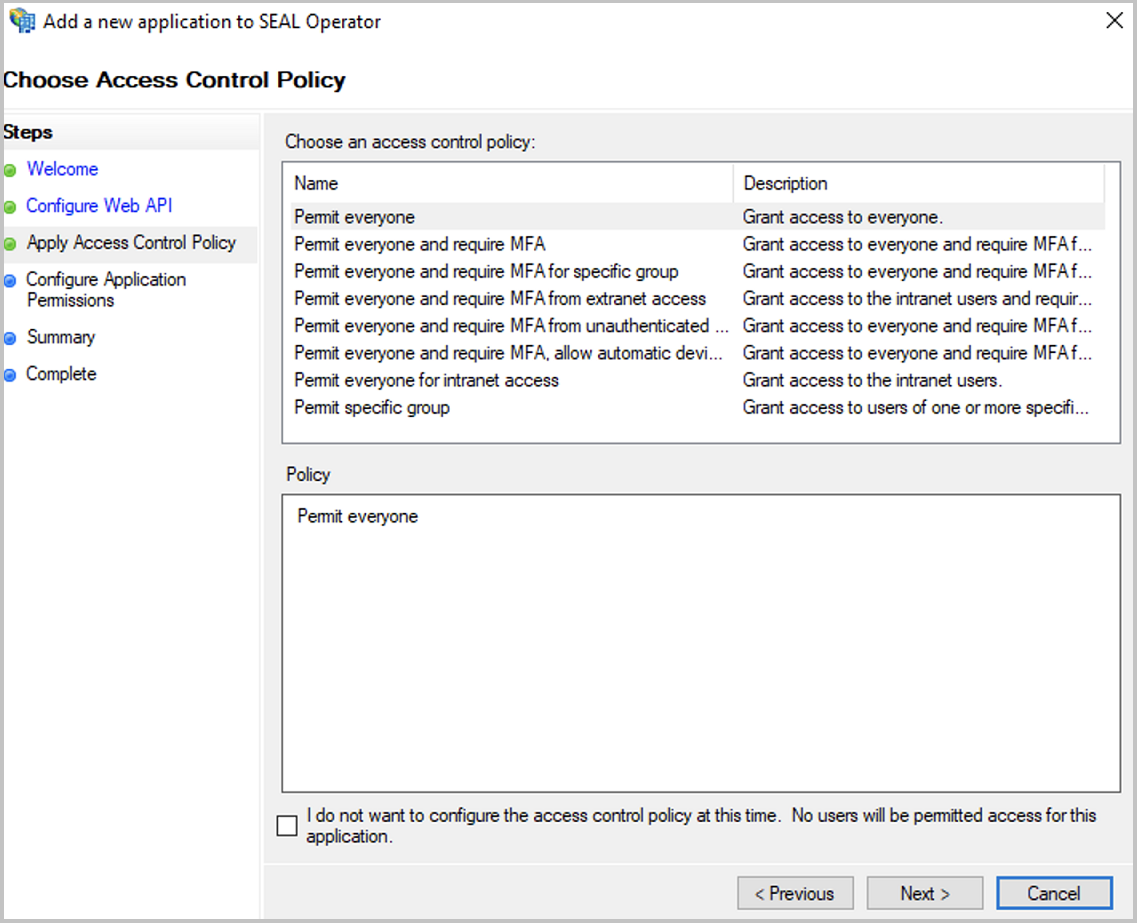
-
In the
Configure Application Permissionsdialog, configure the scopes that can be used by the Web API.For SEAL Operator, tick the following
Permitted scopes:emailopenidprofile
Proceed with
Next.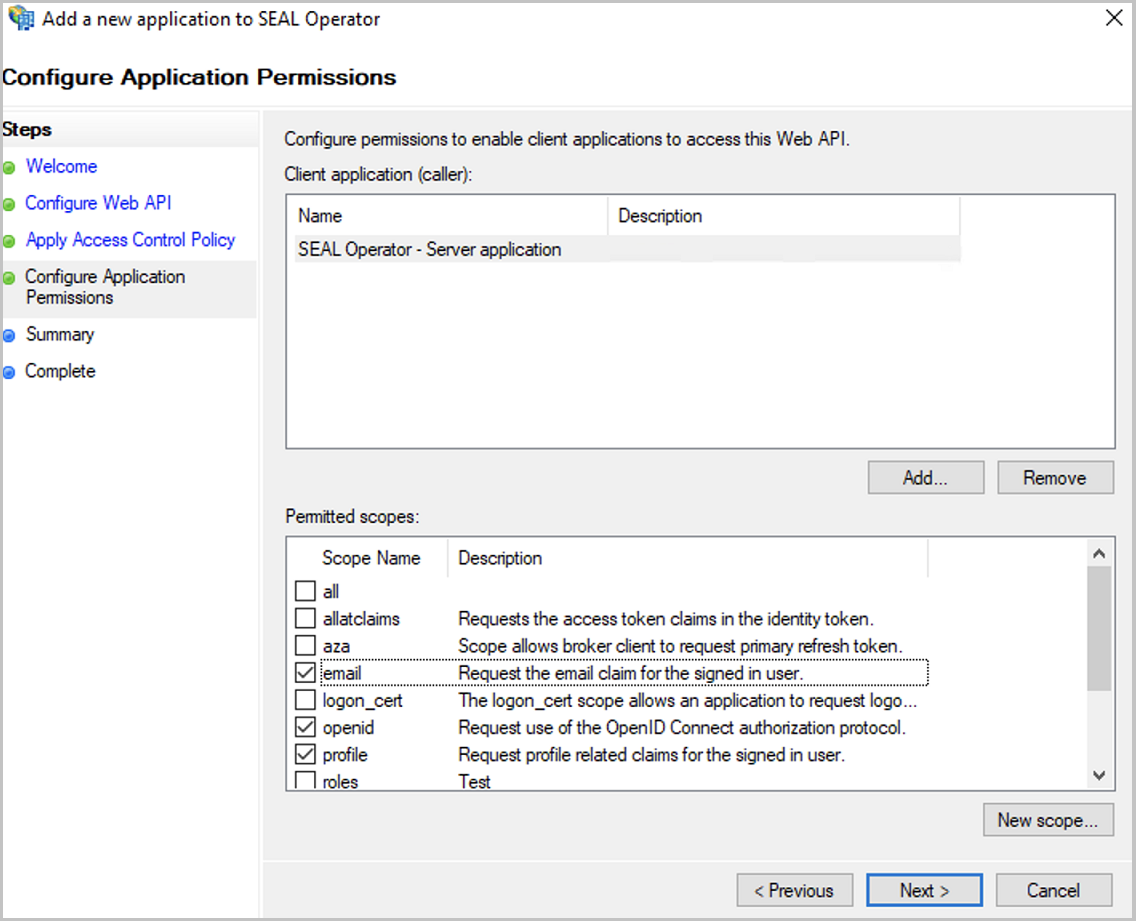
-
Finish the configuraton with
Close.
Configuring Transform Rules
Configure the transform rules in order to retrieve all necessary information for the clients from the JWT token.
The following instructions show the steps using the example of SEAL Operator. They are identical for other clients.
-
In the application group dialog, double-click the Web API or select the Web API and select
Edit.... -
Change to the
Issuance Transform Rulestab.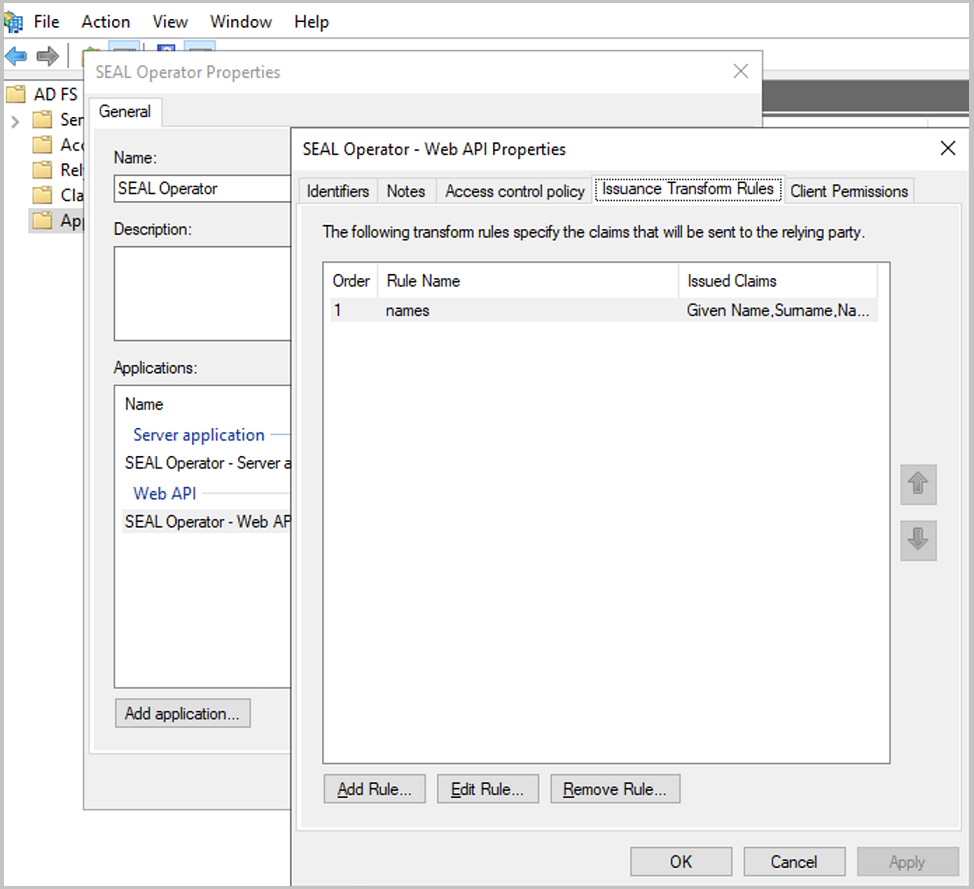
-
Open the wizard with
Add Rule .... -
In the
Select Rule Templatedialog, selectSend LDAP Attributes as Claimsand proceed withNext.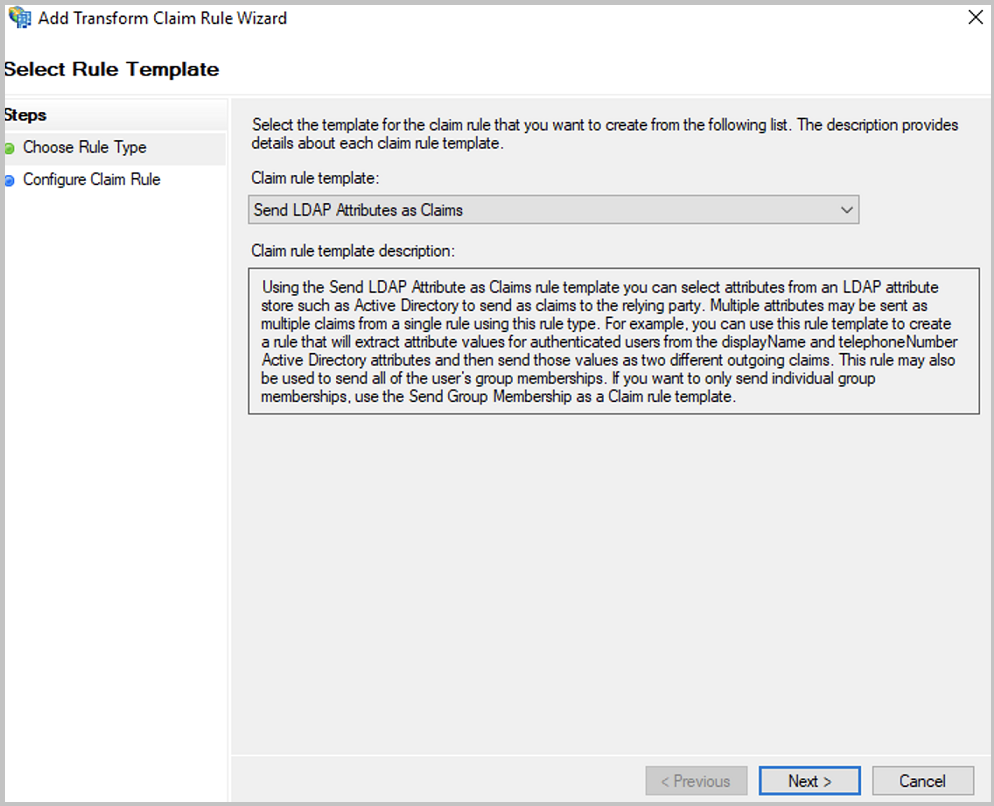
-
In the
Configure Ruledialog, specify a name for the rule, for examplenames. User names are mapped here.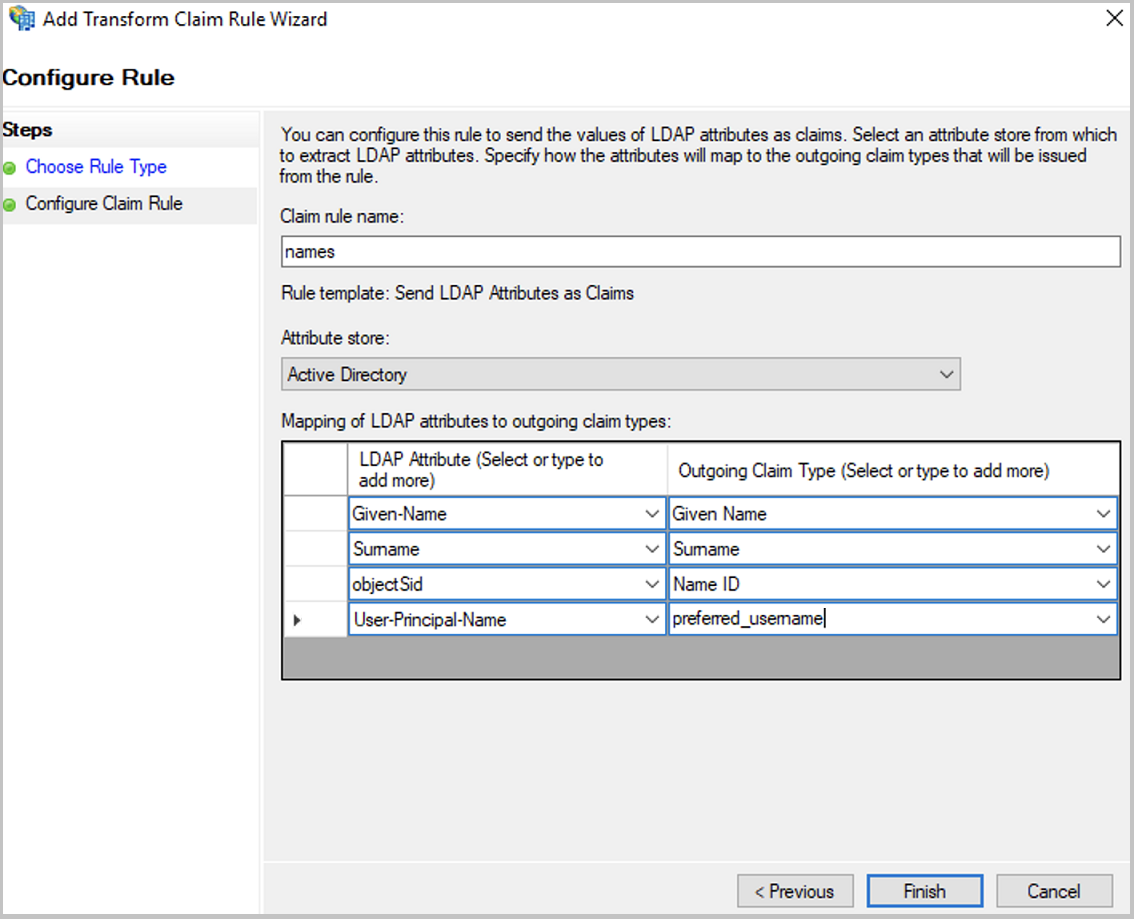
-
In
Attribute store, selectActive Directory. -
Configure the mapping table as follows:
LDAP Attribute Outgoing Claim Type Given-Name Given Name (Vorname) Surname Surname (Nachname) objectSid Name ID (Namens-ID) User-Principal-Name preferred_username (angegebener Name) Hint - rewiew settings
You may review the settings in the AD FS Management Console in
Service-Claim Description Folder. -
Open the wizard again with
Add Rule .... -
In the
Select Rule Templatedialog, selectSend Claims Using a Custom Ruleand proceed withNext.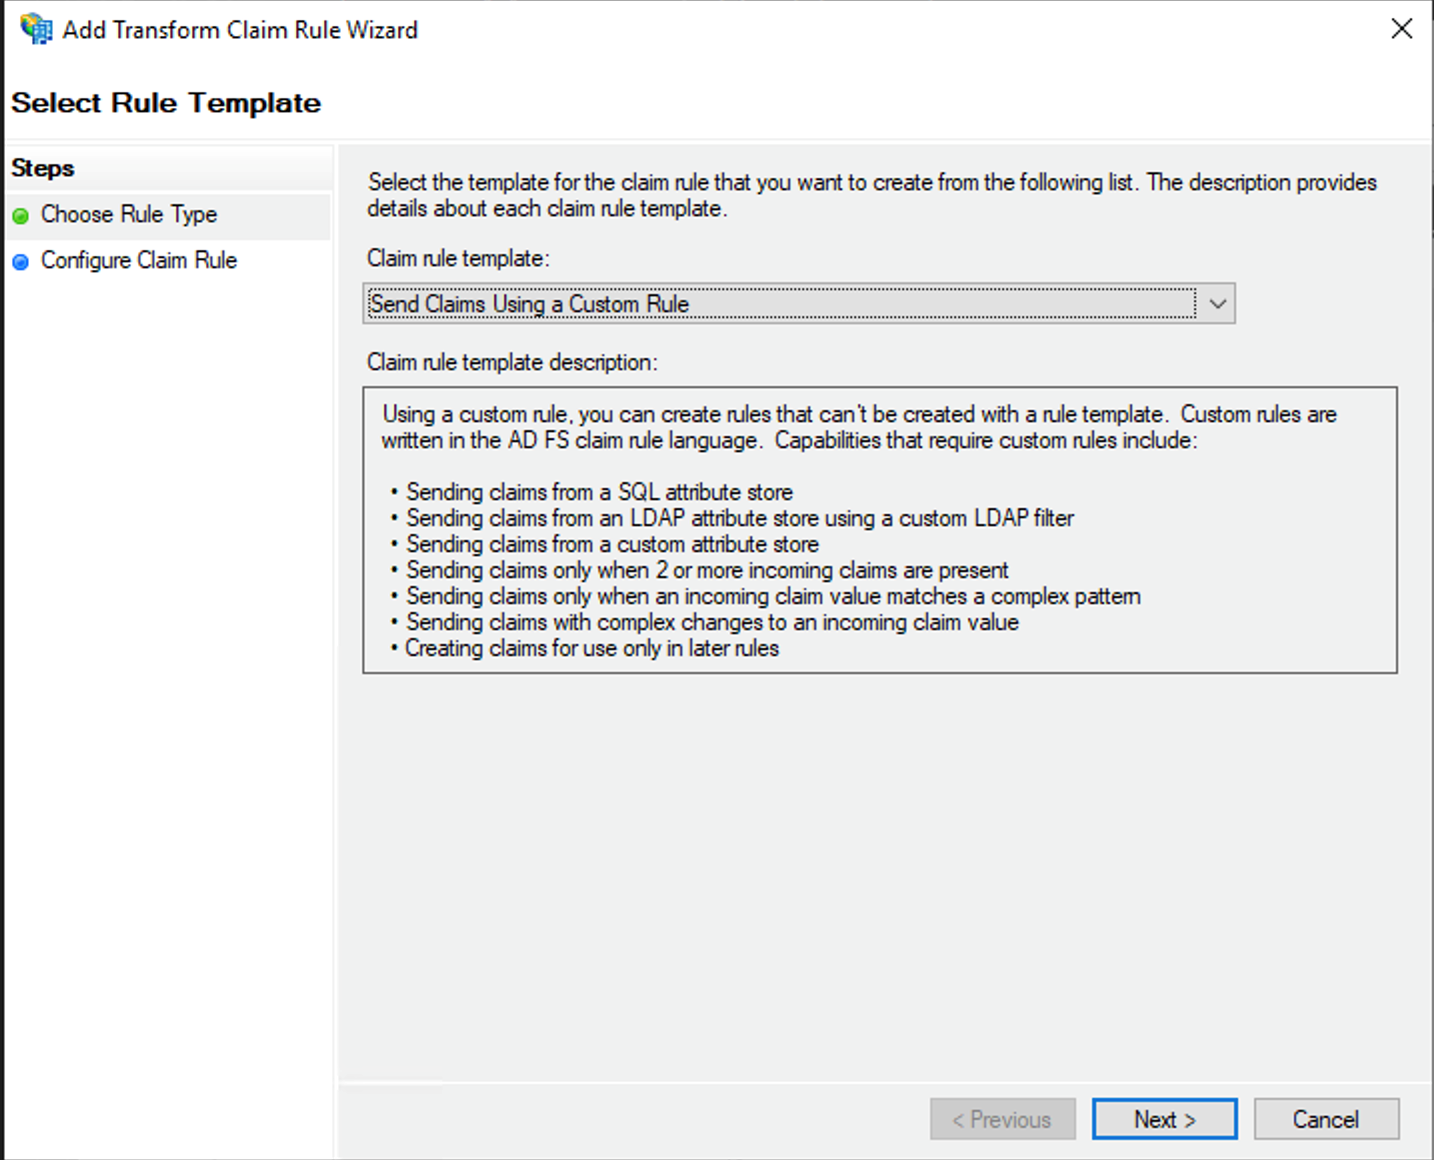
-
In the
Configure Ruledialog, specify a name for the rule:Here
subforccf.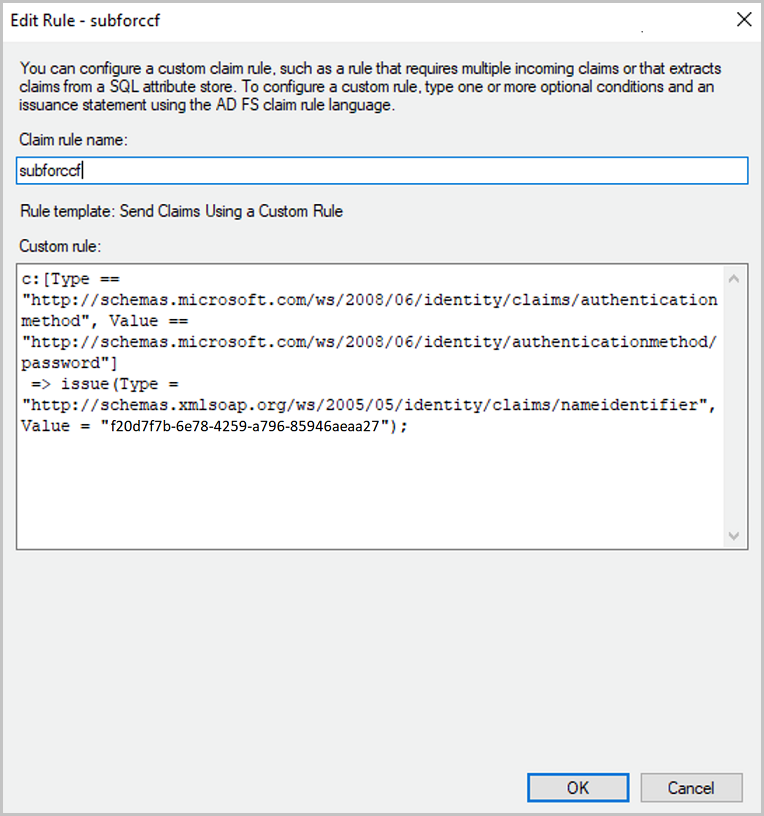
-
In the
Custom rulefield, specify the rule as follows:c:[Type == "https://schemas.microsoft.com/ws/2008/06/identity/claims/authenticationmethod", Value == "https://schemas.microsoft.com/ws/2008/06/identity/authenticationmethod/password"] => issue(Type = "https://schemas.xmlsoap.org/ws/2005/05/identity/claims/nameidentifier", Value = "<client_id>");With
<client_id>:Client Identifierof the Application,here
f20d7f7b-6e78-4259-a796-85946aeaaa27) -
Finish the configuration with
Finish.
Exporting the JWT Certificate from the Client
SEAL Operator needs to verify the JWT tokens from the AD FS server. Therefore, you need the public part of the certificate that the AD FS server uses for signing the tokens.
-
In the AD FS Management Console, open
Service/Certificates.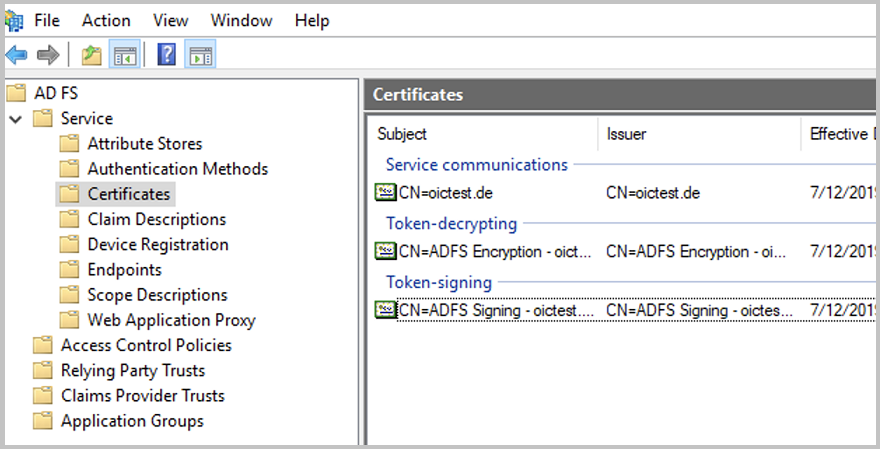
-
Export the certificate to a .CER file with Base-64 encoding. You will need later for the configuration of the SEAL Operator part (
ID_PROVIDER_CERT).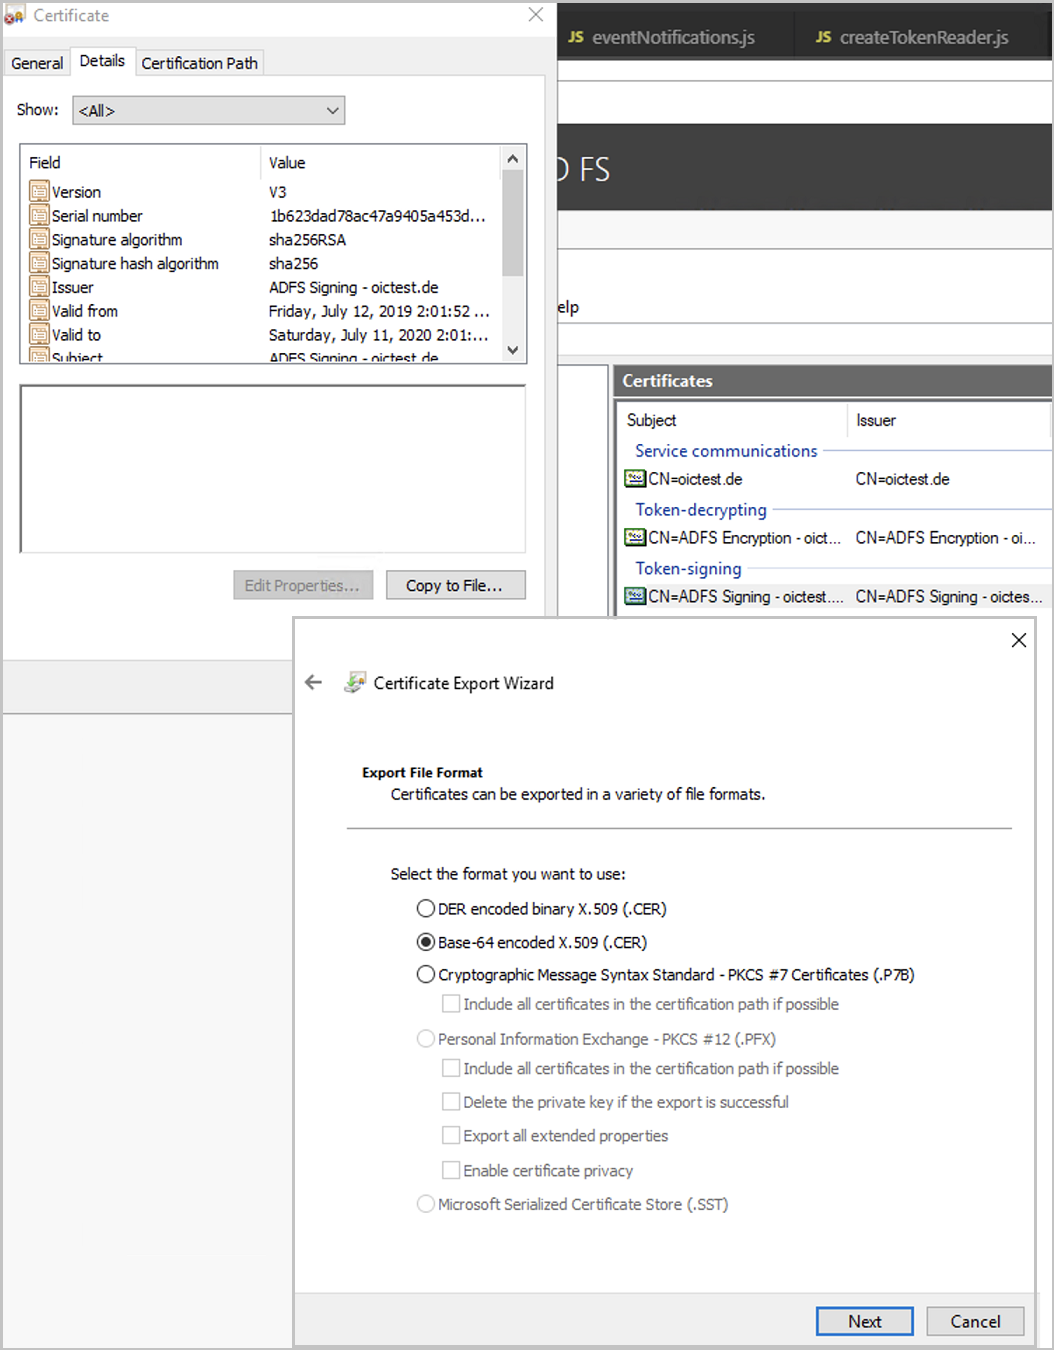
-
In the AD FS Management Console, open
Service/Endpointsand check the URLs forOpenID Connect. Here, you see the URL of the identity provider. You will need this information later for the configuration of the SEAL Operator part (AUTH_ISSUER_URLandAUTH_TOKEN_ENDPOINT).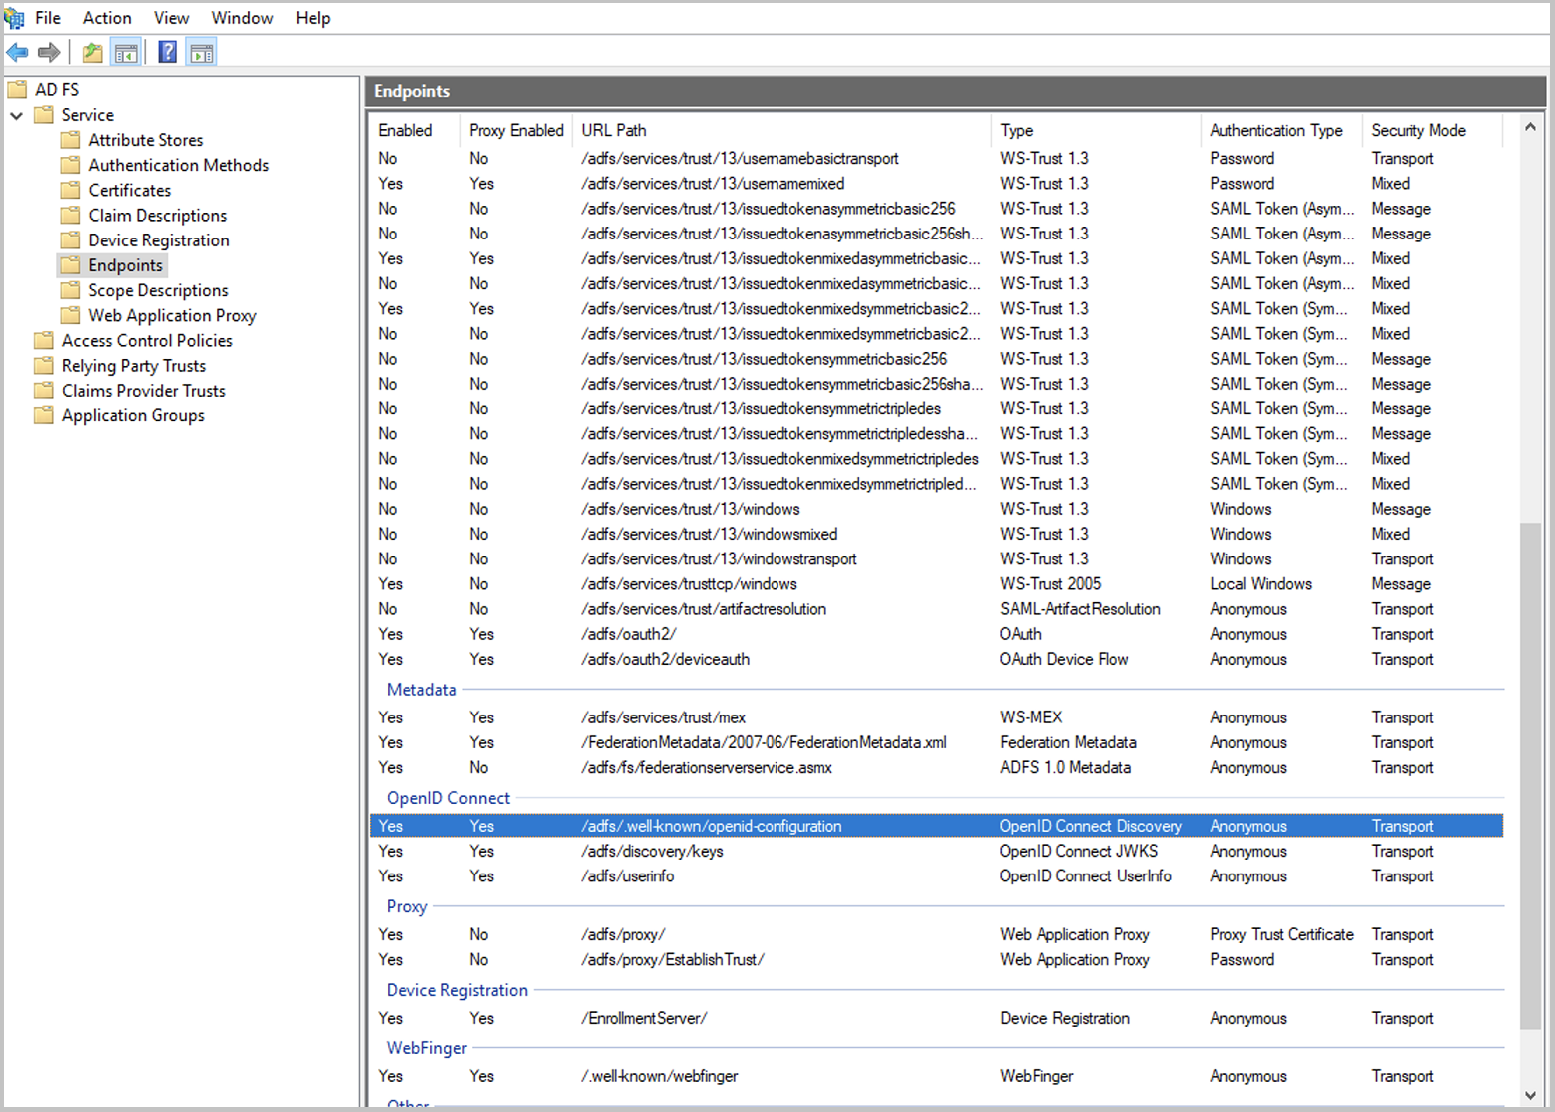
Literature - Configuring the SEAL Operator part
For details on the configuration of the SEAL Operator part, refer to SEAL Operator.
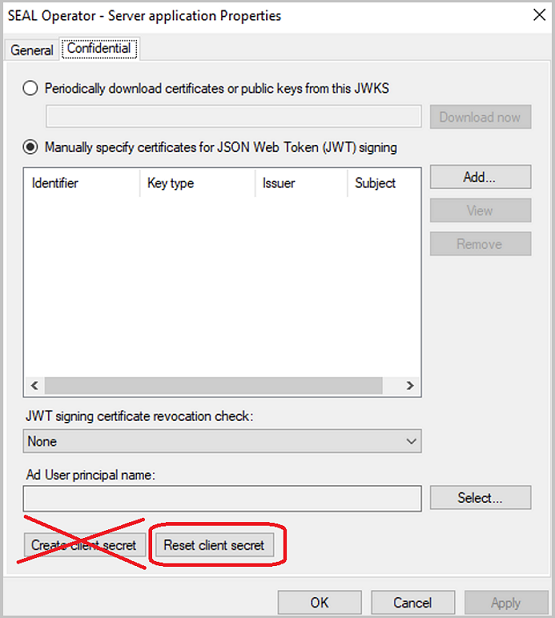
Hint - trouble-shooting - incorrect client credentials
If the services encounter incorrect client information or authentication issues, reset the client secret as follows:
- Open the properties of the application group.
- Open the properties of your server application type.
- In the
Confidentialtab, clickReset client secret. - Reconfigure the client secret in SEAL Operator.
Caution - avoid connection problems
Make sure that you use Reset client secret. Using Create client secret instead will lead to connection problems.
Hint - test credentials with a cURL call
For testing the credentials, call the token endpoint via a cURL call:
curl -X POST \
  <token_endpoint> \
  -H 'Content-Type: application/x-www-form-urlencoded' \
  -H 'cache-control: no-cache' \
  -d 'grant_type=client_credentials&client_id=<client_identifier>&client_secret=<client_secret>'
Example - cURL call for testing the credentials
curl -X POST \
  https://oidctest.de/adfs/oauth2/token \
  -H 'Content-Type: application/x-www-form-urlencoded' \
  -H 'cache-control: no-cache' \
  -d 'grant_type=client_credentials&client_id=f20d7f7b-6e78-4259-a796-85946aeaaa27&client_secret=ZveeFKncasjTvkCVul7jS_d_SdlltJLgFeW2-4IU'
Configuring Roles
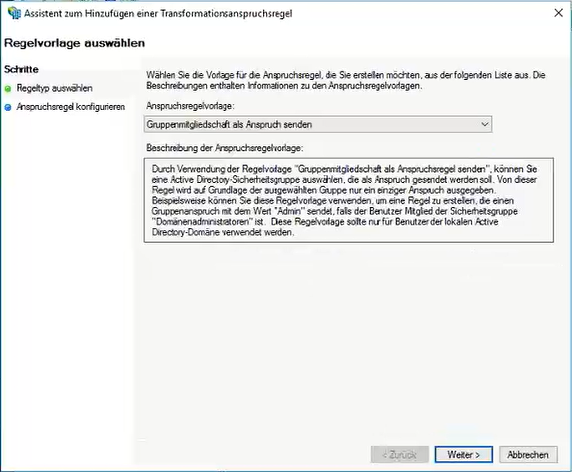
Several SEAL Applications support the concept of roles like admin or user. These roles need to be inserted in the access token. With additional Transform Rules you can configure AD FS to send custom claims based on the users group membership.
Example of Transform Rules (on a German Windows server)
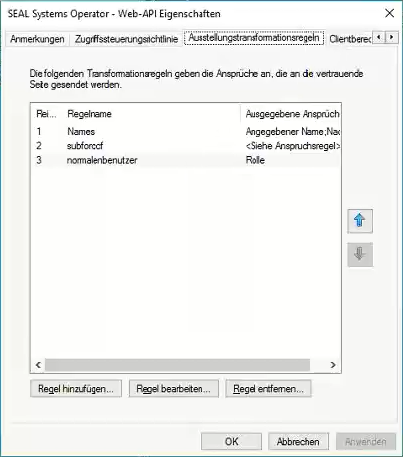
Example of the starting rule assistant to add a rule
Caution - Roles in SEAL products
The claim names, e. g. "role", have to be configured in SEAL products too.
For example, the names configured in AD FS must match the names in the JWT_ROLES configuration property for SEAL Operator.